UDOO. Discover new single board computer with Wi-fi and Quad-core CPU supporting easy Android-Linux switch and fully compatible with Arduino.
Pine 64
PINE64 is an open source platform from both hardware to software. It’s a versatile single board computer capable of running today’s most advanced 64 bit version of Android and Linux.
Orange Pi
Orange Pi. It’s an open-source single-board computer. It can run Android 4.4 , Ubuntu, Debian, Rasberry Pi Image, it uses the AllWinner H3 SoC, and has 1GB DDR3 SDRAM
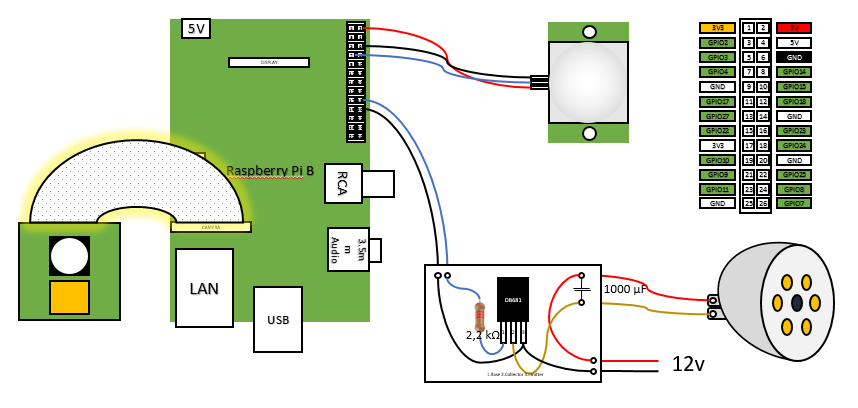
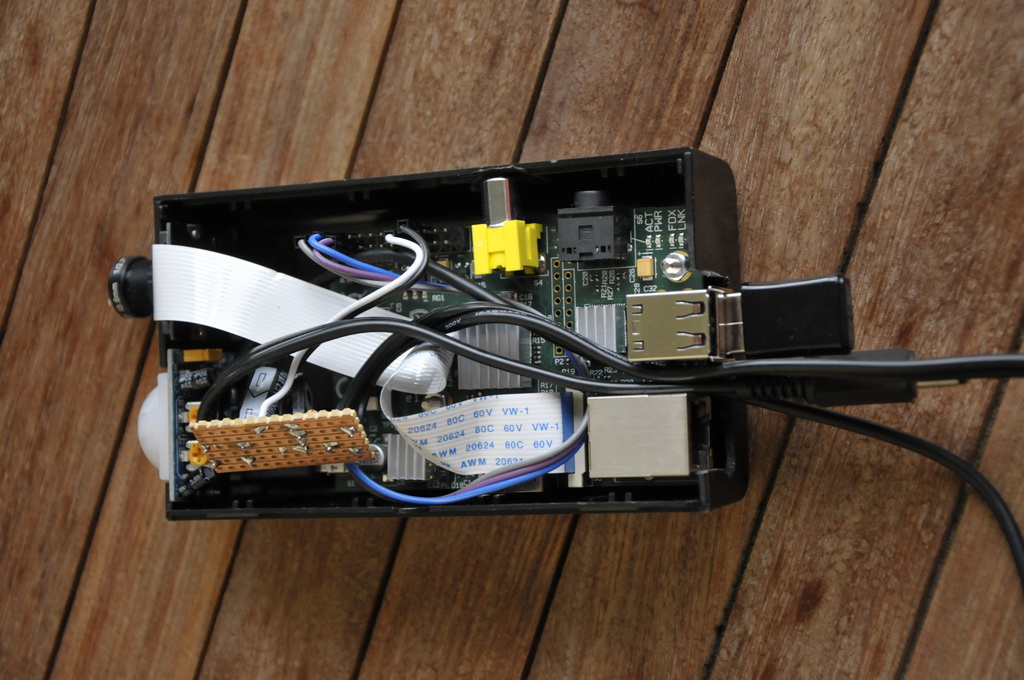
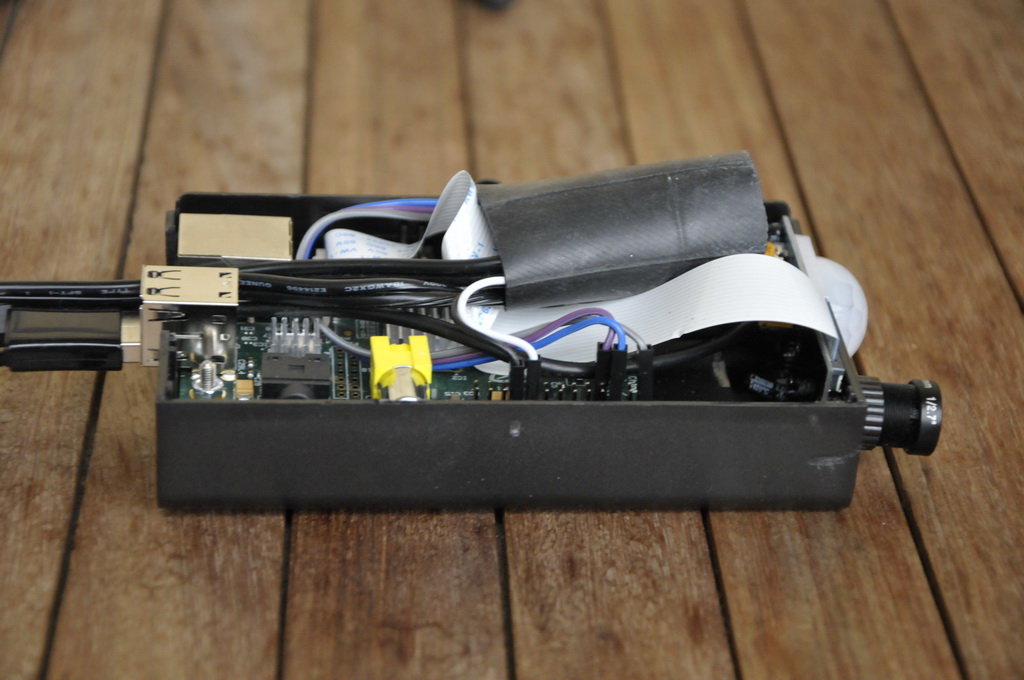
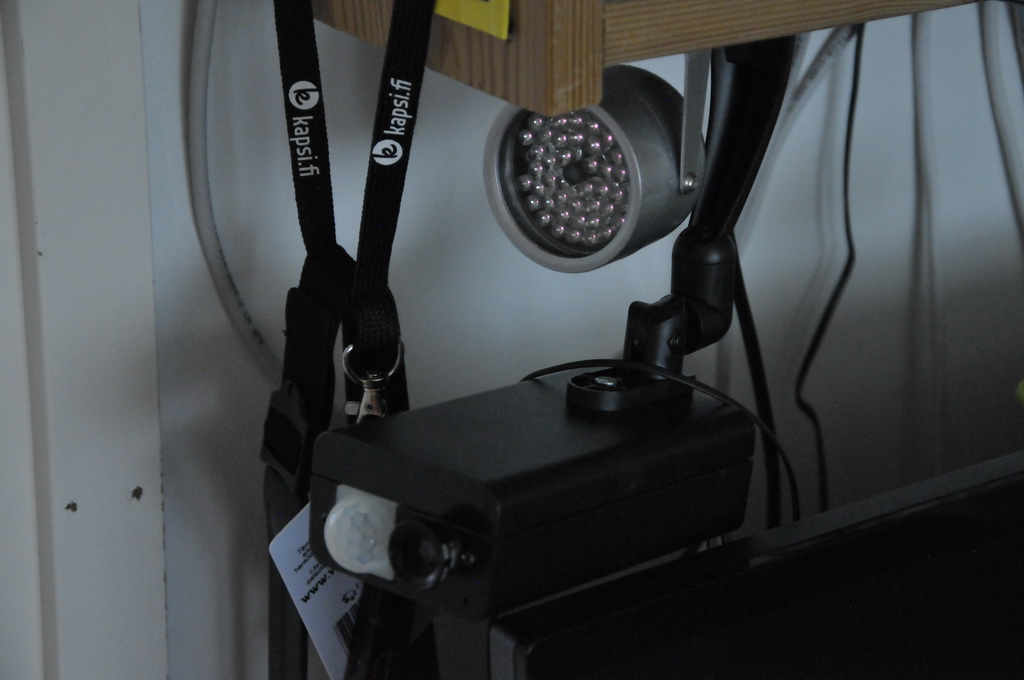
Raspberry Pi motion detection IR Camera with IR lights
Raspberry Pi camera module with PIR motion detector with external IR Lights
HW version 2.0
SW version 1.7.1
Camera shoot video as long movement is detected and take image every 10 minutes.
Application takes care that old recordings are removed and there is always enough disk space available. The amount of free disk space can be set on application settings.
This work is still in progress. Next I am planning to add possibility to store recordings on external server and change the schematic so that single 12V power is used instead of 5V and 12V which are used in this configuration.
The idea in this configuration is that when motion is detected python application gets information of it and it will turn the illuminator on and start recording. Recording continue until movement is no longer detected.
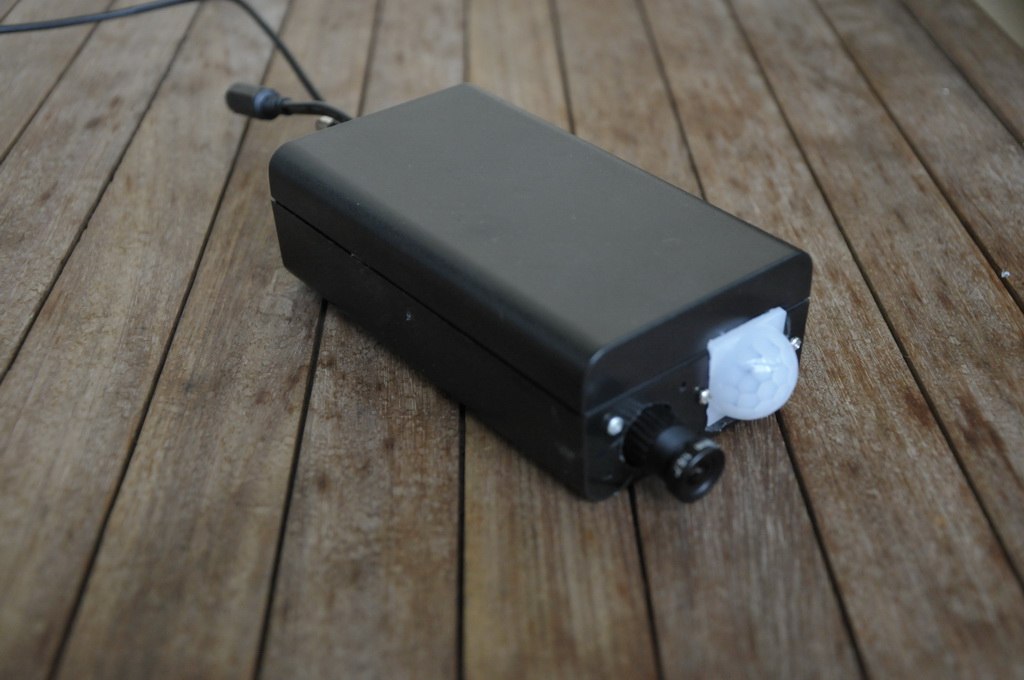
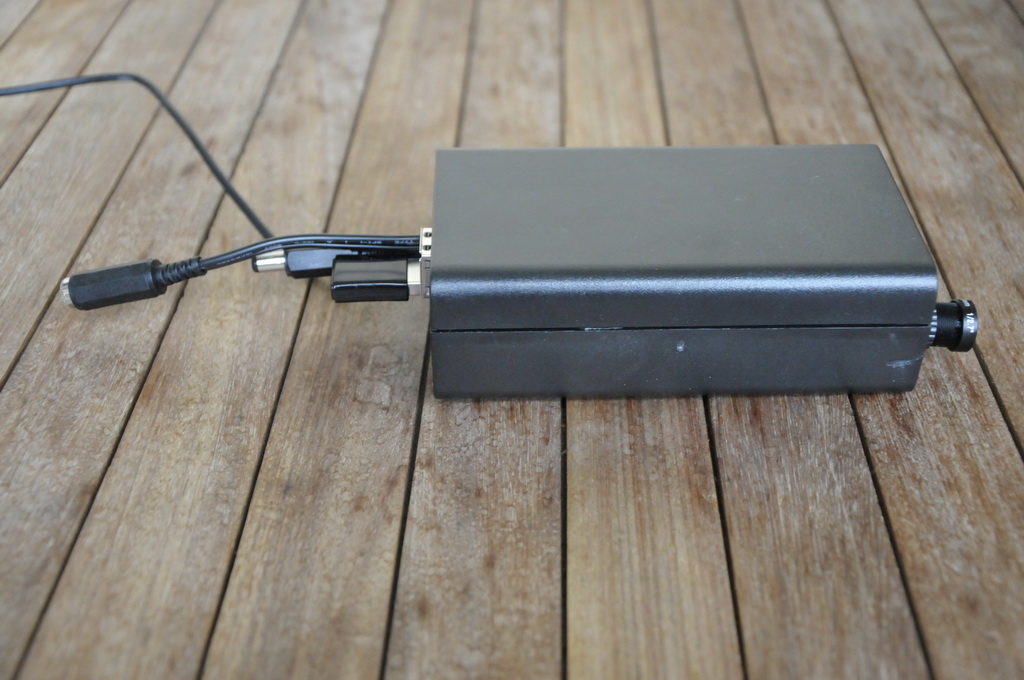
The whole system is packed into standard casing since I don’t have 3D printer to create custom case.
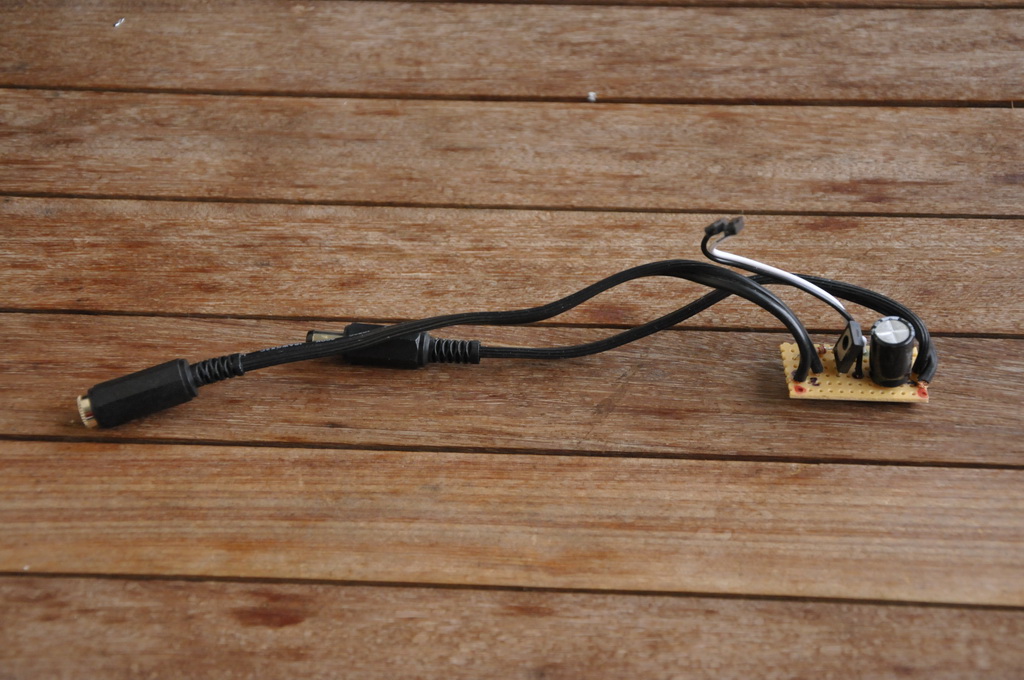
I used TIP 120 based configurations as a base of my build. Since TIP 120 was not available locally I used DB681 darlington transistor instead. The 1000 µF capacitor was added to remove flicker. Without capacitor it light was flickering when standard 12v power source was used.
The switch was build on separate board and connected to Raspberry Pi and insulated from Pi by using bike tire inner tube. On my original build switch was located on separate case.
In this configuration PIR is connected on 5v, GND and GPIO4. Switch uses GPIO 24.
Raspberry Pi plays automatically images from inserted USB flash drive and is shutdown by pressing the button inserted into the device.
feh is used to display the images from USB and python script to shut down the device.
I collected tips from several pages and try to list as many of them at the end of this article.
Prepare Raspberry Pi
Install standard rasbian package from www.raspberrypi.org by following the image installation guide. NOOBS will do just fine too.
Setup Raspberry Pi according to your preferences. Only thing to ensure is that Raspberry start on GUI. Instructions can be found also from www.raspberrypi.org. You need keyboard on first startup.
You can use either console directly from Raspberry Pi or as I prefer SSH to connect the device. My preferred SSH client is MobaXterm.
Install feh and setup startup files
Update rasbian and install feh. Network connection is needed.
sudo apt-get update sudo apt-get upgrade sudo apt-get install feh
Create mount point
Mount point is needed to ensure all USB flash drives are treated same way. If USB is not mounted it will show under media as the way flash drive is named. For example KINGSTON would be ’/media/KINGSTON’ and could not be detected by feh if different flash drive was used previously
sudo mkdir /media/usb
Create shutdown.py
This phase can be skipped if button is not used to shutdown Raspberry Pi. I do recommend using this since shutting down the Raspberry Pi simply by unplucking the device can cause the SD or USB flash drive corruption.
Connecting the GPIO 17 to the ground will cause shutdown to be performed. You may use other pins also but code need to be changed accordingly.
# Turn TV on
0 8 * * 1-5 echo "on 0" | cec-client -s
# Turn TV off
0 16 * * 1-5 echo "standby 0" | cec-client -s
This worked fine with TV
Conclusion
The Raspberry Pi A+ works fine with feh and USB flash drive. Simple configuration without anything fancy. Just power on the Pi and images start to roll directly from USB and it can be shutdown properly by connecting the 9 and 11 pins (button).
What next
A lot could be done. I tested already some digital signage solutions but for my use case this one was the most convenient especially since my goal was to get my Raspberry Pi A+ in good use. I did all the tasks mentioned in this article in my Raspberry Pi 2 since it is so much faster and have ethernet port build in and used the A+ after everything was ready. 🙂
Possibility to fetch images from some external source can be reached with feh and insertion of USB while feh is running. Just keep reading the references and other sources.
Starting the RPi by connecting the run pins could be added so that power doesn’t need to be removed and reconnected. One button to shutdown RPi and another to start it up again. RPi uses very little power when it is on idle.
Perhaps archinux could be used instead of rasbian?
On the video embed is given one opinion of best mods made so far and which are already reached commercial stage. I have played all except one of them as mod and even some commercial versions.
Oheisella videolla annetaan yksi mielipide parhaista modeista joita on tehty ja jotka ovatkin yksi kerrallaan muuttuneet maksullisiksi tavalla tai toisella. Yhtä lukuunottamatta onkin tullut kaikkia pelailtua jo silloin kuin ne olivat modeja tai jopa kaupallista versiota.
We use cookies on our website to give you the most relevant experience by remembering your preferences and repeat visits. By clicking “Accept All”, you consent to the use of ALL the cookies. However, you may visit "Cookie Settings" to provide a controlled consent.
This website uses cookies to improve your experience while you navigate through the website. Out of these, the cookies that are categorized as necessary are stored on your browser as they are essential for the working of basic functionalities of the website. We also use third-party cookies that help us analyze and understand how you use this website. These cookies will be stored in your browser only with your consent. You also have the option to opt-out of these cookies. But opting out of some of these cookies may affect your browsing experience.
Necessary cookies are absolutely essential for the website to function properly. These cookies ensure basic functionalities and security features of the website, anonymously.
Cookie
Duration
Description
cookielawinfo-checkbox-analytics
11 months
This cookie is set by GDPR Cookie Consent plugin. The cookie is used to store the user consent for the cookies in the category "Analytics".
cookielawinfo-checkbox-functional
11 months
The cookie is set by GDPR cookie consent to record the user consent for the cookies in the category "Functional".
cookielawinfo-checkbox-necessary
11 months
This cookie is set by GDPR Cookie Consent plugin. The cookies is used to store the user consent for the cookies in the category "Necessary".
cookielawinfo-checkbox-others
11 months
This cookie is set by GDPR Cookie Consent plugin. The cookie is used to store the user consent for the cookies in the category "Other.
cookielawinfo-checkbox-performance
11 months
This cookie is set by GDPR Cookie Consent plugin. The cookie is used to store the user consent for the cookies in the category "Performance".
viewed_cookie_policy
11 months
The cookie is set by the GDPR Cookie Consent plugin and is used to store whether or not user has consented to the use of cookies. It does not store any personal data.
Functional cookies help to perform certain functionalities like sharing the content of the website on social media platforms, collect feedbacks, and other third-party features.
Performance cookies are used to understand and analyze the key performance indexes of the website which helps in delivering a better user experience for the visitors.
Analytical cookies are used to understand how visitors interact with the website. These cookies help provide information on metrics the number of visitors, bounce rate, traffic source, etc.
Advertisement cookies are used to provide visitors with relevant ads and marketing campaigns. These cookies track visitors across websites and collect information to provide customized ads.